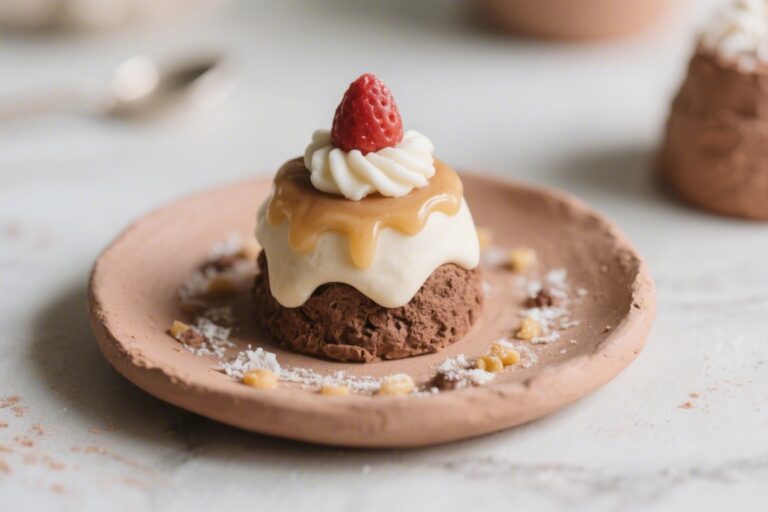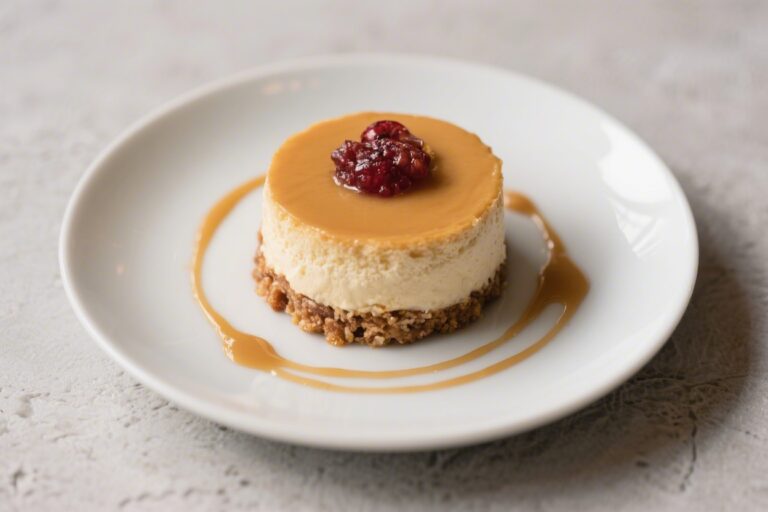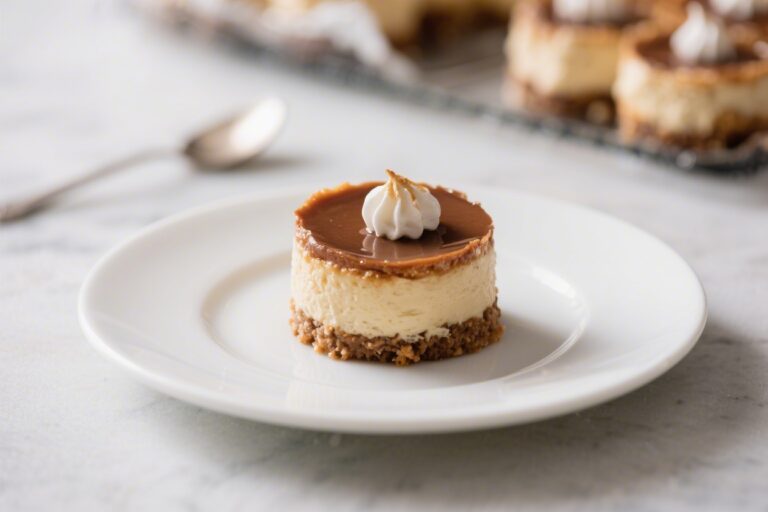
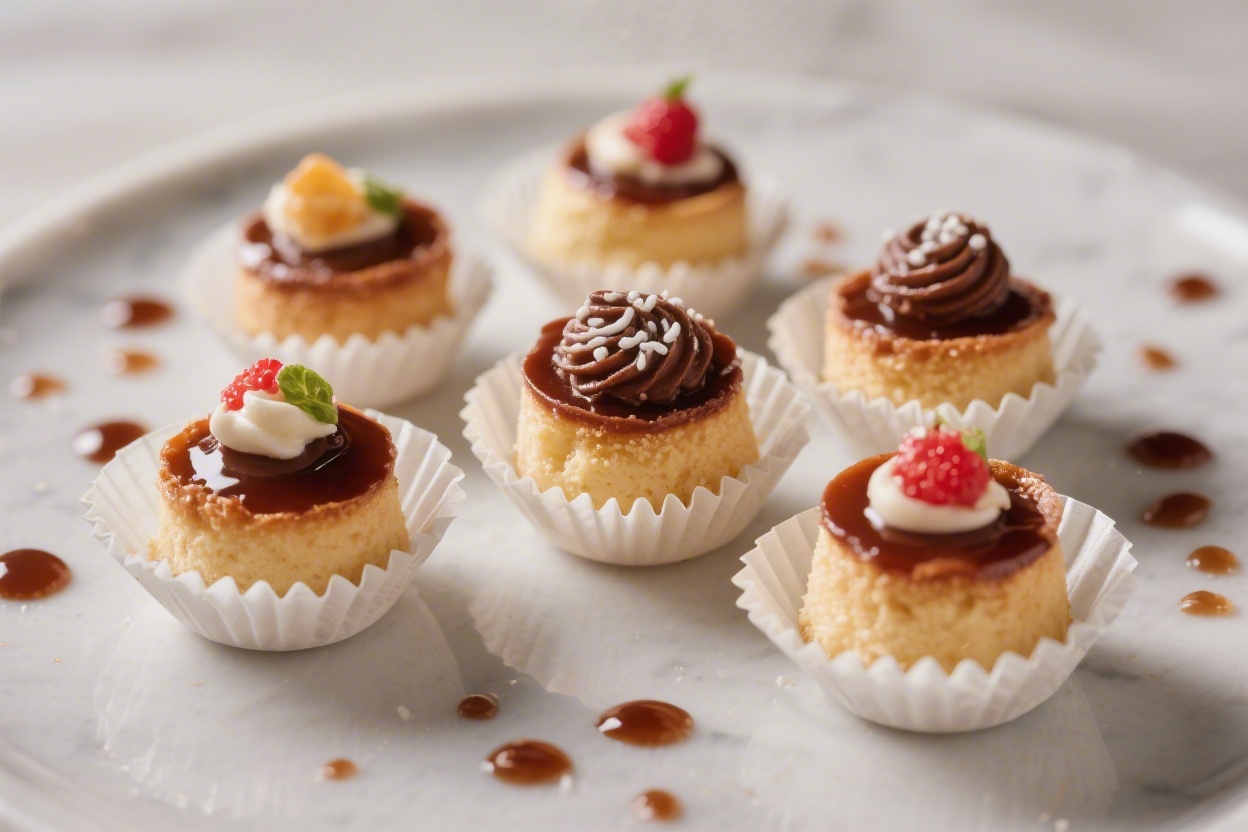
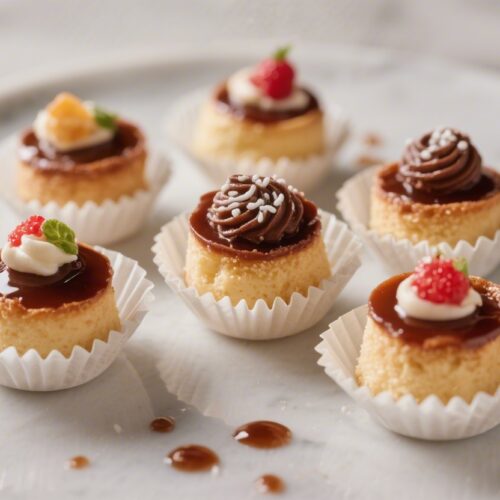
Mini Dessert for Parties That Disappears Fast – Bite-Size Cheesecake Cups
These mini cheesecake cups are the kind of dessert that vanish faster than you can set them down. They’re creamy, not too sweet, and easy to grab with one hand. Best of all, you can top them any way you like—fruit, chocolate, caramel, or a little crunch.
They look polished on a platter, but they’re simple enough for a weeknight. If you need a dependable party treat, this is it.
What Makes This Special
Mini Dessert for Parties That Disappears Fast - Bite-Size Cheesecake Cups
Ingredients
- For the crust:
- 1 1/2 cups graham cracker crumbs (about 10–12 crackers)
- 5 tablespoons unsalted butter, melted
- 2 tablespoons granulated sugar
- Pinch of fine salt
- For the filling:
- 16 oz cream cheese, softened to room temperature
- 1/2 cup granulated sugar
- 2 large eggs, room temperature
- 1/3 cup sour cream
- 1 teaspoon pure vanilla extract
- 1 tablespoon lemon juice (optional, for brightness)
- Pinch of salt
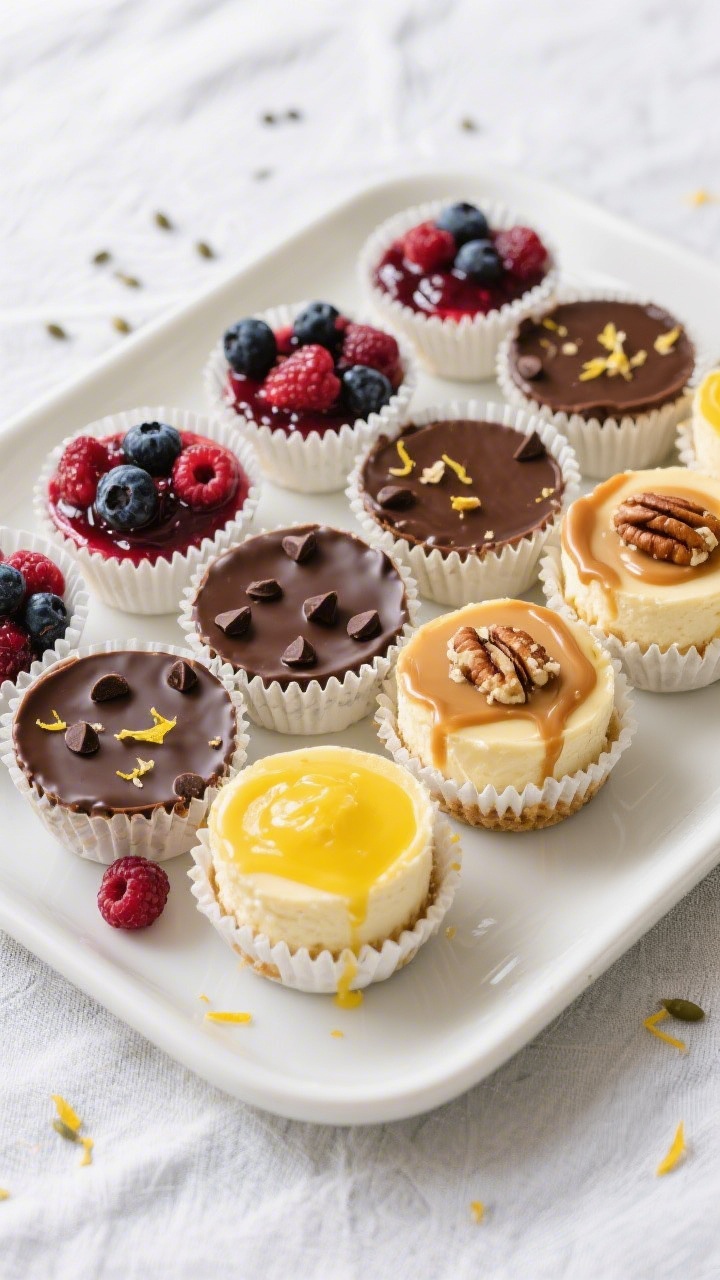
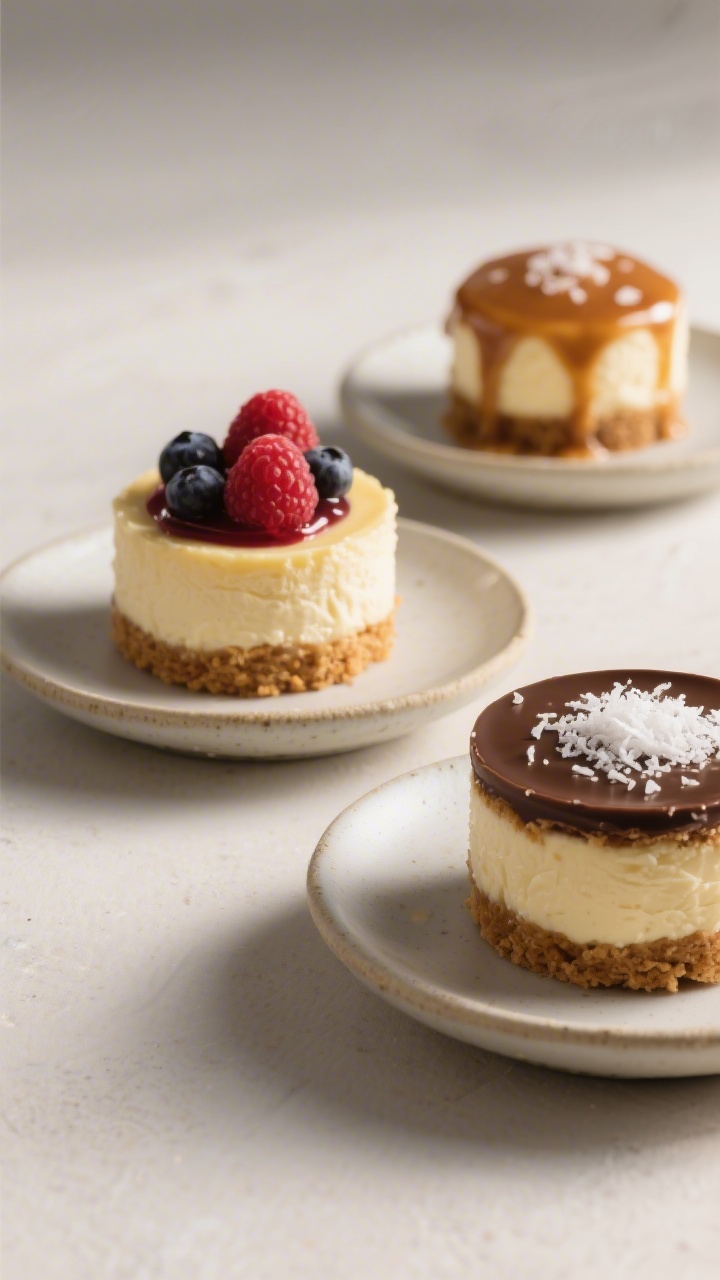
- Toppings (choose your favorites):
- Fresh berries, berry jam, or lemon curd
- Salted caramel, chocolate ganache, or Nutella
- Crushed nuts, toasted coconut, or mini chocolate chips
- Tools: 12-cup muffin tin, paper liners, mixing bowls, hand mixer or stand mixer, spoon or small scoop
Instructions
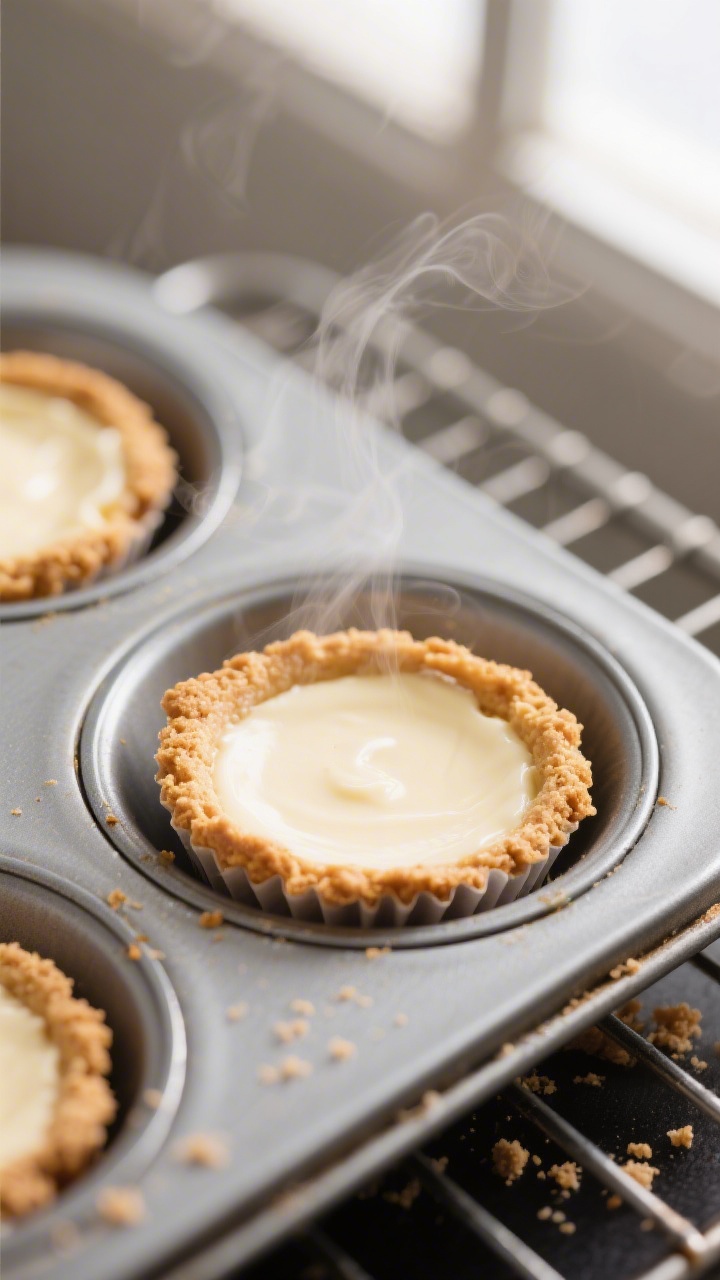
- Prep the pan: Line a 12-cup muffin tin with paper liners. Preheat the oven to 325°F (165°C).
- Make the crust: Stir graham crumbs, melted butter, sugar, and salt until evenly moistened. It should feel like damp sand.
- Press and bake: Divide the crust mixture among cups (about 1 heaping tablespoon each). Press firmly with the back of a spoon. Bake 5–6 minutes, then cool slightly.
- Beat the filling: In a bowl, beat cream cheese and sugar on medium until smooth and fluffy, about 2 minutes. Scrape the bowl.
- Add the rest: Beat in eggs one at a time on low speed. Mix in sour cream, vanilla, lemon juice, and salt until just combined. Do not overmix.
- Fill the cups: Spoon the batter over crusts, filling each about 3/4 full. Tap the pan gently to release air bubbles.
- Bake: Bake 15–18 minutes, until edges are set and centers still jiggle slightly. They’ll finish setting as they cool.
- Cool and chill: Cool in the pan 20 minutes, then transfer to a rack. Chill at least 2 hours, preferably overnight, for best texture.
- Top and serve: Add your favorite toppings right before serving. Keep them bite-size friendly.
- One-bite size: Perfect for parties, potlucks, and brunch tables—no forks needed.
- Customizable: Set up a topping bar or keep it classic with berries and jam.
- Quick bake, faster chill: Small size means less oven time and speedier cooling.
- Reliable texture: Silky center with a lightly crisp, buttery crust.
- Make-ahead friendly: They hold well in the fridge for days.
What You’ll Need
- For the crust:
- 1 1/2 cups graham cracker crumbs (about 10–12 crackers)
- 5 tablespoons unsalted butter, melted
- 2 tablespoons granulated sugar
- Pinch of fine salt
- For the filling:
- 16 oz cream cheese, softened to room temperature
- 1/2 cup granulated sugar
- 2 large eggs, room temperature
- 1/3 cup sour cream
- 1 teaspoon pure vanilla extract
- 1 tablespoon lemon juice (optional, for brightness)
- Pinch of salt
- Toppings (choose your favorites):
- Fresh berries, berry jam, or lemon curd
- Salted caramel, chocolate ganache, or Nutella
- Crushed nuts, toasted coconut, or mini chocolate chips
- Tools: 12-cup muffin tin, paper liners, mixing bowls, hand mixer or stand mixer, spoon or small scoop
Instructions
- Prep the pan: Line a 12-cup muffin tin with paper liners. Preheat the oven to 325°F (165°C).
- Make the crust: Stir graham crumbs, melted butter, sugar, and salt until evenly moistened.
It should feel like damp sand.
- Press and bake: Divide the crust mixture among cups (about 1 heaping tablespoon each). Press firmly with the back of a spoon. Bake 5–6 minutes, then cool slightly.
- Beat the filling: In a bowl, beat cream cheese and sugar on medium until smooth and fluffy, about 2 minutes.
Scrape the bowl.
- Add the rest: Beat in eggs one at a time on low speed. Mix in sour cream, vanilla, lemon juice, and salt until just combined. Do not overmix.
- Fill the cups: Spoon the batter over crusts, filling each about 3/4 full.
Tap the pan gently to release air bubbles.
- Bake: Bake 15–18 minutes, until edges are set and centers still jiggle slightly. They’ll finish setting as they cool.
- Cool and chill: Cool in the pan 20 minutes, then transfer to a rack. Chill at least 2 hours, preferably overnight, for best texture.
- Top and serve: Add your favorite toppings right before serving.
Keep them bite-size friendly.
How to Store
- Refrigerate: Keep covered in the fridge for up to 5 days. Add fresh fruit the day you serve to avoid weeping.
- Freeze: Freeze without toppings for up to 2 months. Thaw overnight in the refrigerator, then top.
- Transport tips: Keep them chilled in a lidded container.
Add toppings after you arrive.
Health Benefits
- Portion control: Mini size naturally helps keep servings moderate.
- Protein and calcium: Cream cheese and sour cream provide both, which help with satiety.
- Lower sugar options: You can reduce added sugar slightly or use fruit-forward toppings for a lighter touch.
- Whole-grain boost: Swap in part whole-wheat graham crumbs for extra fiber if you like.
Common Mistakes to Avoid
- Cold ingredients: Cold cream cheese leads to lumpy batter. Let dairy come to room temp.
- Overmixing: Too much air creates cracks. Mix on low and stop once combined.
- Overbaking: If the centers are fully firm in the oven, they’ll be dry.
Look for a slight jiggle.
- Skipping chill time: Warm cheesecake won’t hold its shape and won’t taste as creamy.
- Wet toppings too early: Jam or fruit juices can make the tops soggy if added hours in advance.
Alternatives
- Cookie crust swap: Try crushed Oreos, Biscoff, shortbread, or gingersnaps instead of grahams.
- Dairy tweaks: Use Greek yogurt in place of sour cream for a tangier bite.
- Flavor twists: Add 1 teaspoon lemon zest, almond extract, or a swirl of raspberry jam before baking.
- No-bake route: Use the same crust, chill to set, then fill with a no-bake cheesecake mixture and refrigerate.
- Gluten-free: Use gluten-free cookies for the crust.
FAQ
Can I make these a day ahead?
Yes. They’re even better the next day. Chill overnight and add toppings before serving.
How do I know when they’re done?
The edges should look set, and the center should wobble slightly when you nudge the pan.
That gentle jiggle is perfect.
Can I double the recipe?
Absolutely. Bake in two muffin tins or in batches. Keep the same oven temperature and timing, checking at 15 minutes.
What if I don’t have paper liners?
Grease the cups well and use a thin knife to release the edges after cooling.
Liners make removal cleaner and quicker, though.
Can I reduce the sugar?
You can cut the filling sugar to 1/3 cup without major texture changes. Taste will be slightly tangier.
Wrapping Up
These mini cheesecake cups are simple, flexible, and crowd-approved. They’re easy to bake, quick to chill, and fun to top.
Make a batch for your next party and watch them disappear—fast.
Printable Recipe Card
Want just the essential recipe details without scrolling through the article? Get our printable recipe card with just the ingredients and instructions.